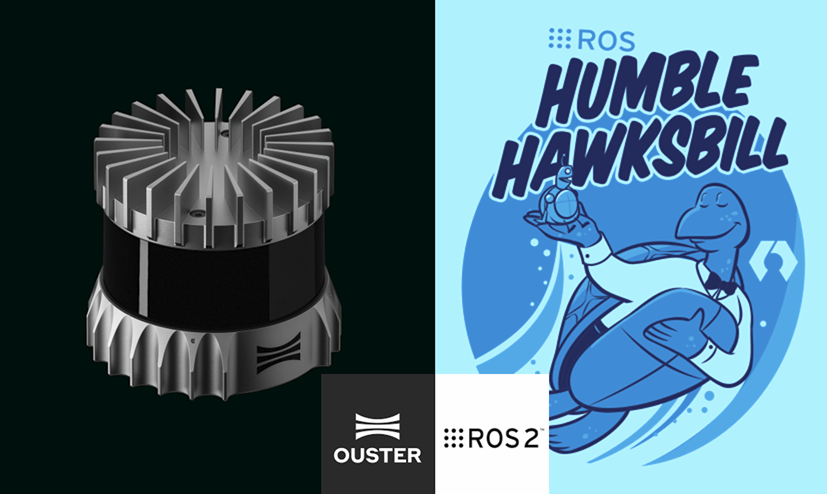
Ouster ROS 2 Driver and CycloneDDS Setup
Step-by-step installation, tuning, and validation on Ubuntu 22.04 LTS with ROS 2 Humble Hawksbill
A complete, beginner-friendly, end-to-end tutorial to install the official Ouster ROS 2 driver alongside the Eclipse CycloneDDS middleware on Ubuntu 22.04 LTS with ROS 2 Humble Hawksbill.
This guide walks through every step required to bring up an Ouster sensor — OS0, OS1 or OS2 — under ROS 2 Humble, configure CycloneDDS for high-density point clouds (typical of an OS0-128 streaming at 20 Hz), tune the Linux kernel UDP buffers to avoid packet loss, and validate the full pipeline before connecting the physical sensor.
⚠️ This tutorial is not a replacement for the official Ouster, ROS 2 and CycloneDDS documentation. It is a practical, opinionated shortcut to help you get a robust setup running in minutes rather than days. For in-depth specifications, advanced configuration, and the complete API reference, always refer to the official resources linked at the end of this guide.
Target use cases: mobile robotics, 3D mapping, nuclear and industrial inspection, SLAM benchmarking, simulation in Gazebo, and any workflow that requires a reliable Ouster ROS 2 pipeline on Ubuntu 22.04.
💡 Looking for the Ubuntu 24.04 + ROS 2 Jazzy version? See the companion repository: Ouster_Driver_CycloneDDS_Ubuntu_24.04_ROS2_Jazzy.
Table of Contents
- Tested Configuration
- Workflow Overview
- Step 1 — Verify ROS 2 Humble Installation
- Step 2 — Update the System
- Step 3 — Install the Ouster ROS 2 Driver
- Step 4 — Install CycloneDDS
- Step 5 — Identify Network Interfaces
- Step 6 — Create the CycloneDDS Configuration File
- Step 7 — Increase Kernel UDP Buffers
- Step 8 — Activate CycloneDDS via
.bashrc - Step 9 — Validate DDS Communication
- Step 10 — First Launch with the Physical Sensor
- Published ROS 2 Topics
- Useful Commands — Record, Replay and PCAP
- 3D → 2D Conversion for SLAM Toolbox
- Multi-Machine Configuration
- Troubleshooting
- Recommended Settings Summary
- Project Files Created
- Official Resources
- License
Tested Configuration
Sensors
- Ouster OS0 — Rev7 / 128 channels (firmware 3.x)
- Ouster OS1 — Rev6 / 64 channels (firmware 2.x)
- Ouster OS1 — Rev7 / 64–128 channels (firmware 3.x)
Host system
- Ubuntu 22.04 LTS (Jammy Jellyfish)
- ROS 2 Humble Hawksbill (LTS, supported until May 2027)
ros-humble-ouster-rosros-humble-rmw-cyclonedds-cppros-humble-cyclonedds- Linux kernel 5.15+ or 6.x
Throughout this guide, replace
<SENSOR_HOSTNAME>with the hostname of your sensor (for exampleos-122448002665.local). The 12-digit serial number is printed on a label on top of the sensor.
Throughout this guide, replace
enp4s0(Ethernet) andwlp3s0(Wi-Fi) with the actual network interface names of your machine. They are identified in Step 5.
Workflow Overview
Verify ROS 2 → Update System → Install Driver → Install CycloneDDS →
Identify Interfaces → Configure CycloneDDS → Tune Kernel Buffers →
Activate in .bashrc → Validate DDS → Connect Sensor → Stream Point Clouds
- Verify that ROS 2 Humble is correctly installed
- Bring the system up to date
- Install the official
ouster-rosdriver viaapt - Install the CycloneDDS middleware via
apt - Identify the Ethernet and Wi-Fi interfaces on the host
- Write a tuned CycloneDDS configuration file
- Raise the kernel UDP receive buffers to absorb dense point-cloud bursts
- Activate CycloneDDS persistently through
.bashrc - Validate DDS communication without the sensor
- Connect the physical Ouster sensor and confirm the topic rates
Step 1 — Verify ROS 2 Humble Installation
Before installing anything, confirm that ROS 2 Humble is properly sourced and reachable from your shell.
source /opt/ros/humble/setup.bash
printenv ROS_DISTRO
ros2 pkg list 2>/dev/null | head -5
Expected output:
printenv ROS_DISTRO→humbleros2 pkg listdisplays the first ROS 2 packages (action_msgs,action_tutorials_cpp, …)
💡 Note. The command
ros2 --versiondoes not exist in ROS 2 — this is normal. Useprintenv ROS_DISTROto confirm the active distribution.
If ROS 2 Humble is not installed yet, follow the official installation guide before continuing.
Step 2 — Update the System
Bring apt package metadata and installed packages up to date.
sudo apt update
sudo apt upgrade -y
This step is short but important: working with mismatched versions of ros-humble-* packages is a common source of subtle bugs.
Step 3 — Install the Ouster ROS 2 Driver
The official driver is published by Ouster and packaged for ROS 2 Humble by Open Robotics.
sudo apt install ros-humble-ouster-ros -y
3.1 Verify the installation
dpkg -l ros-humble-ouster-ros | tail -1
ls $(ros2 pkg prefix ouster_ros)/share/ouster_ros/launch/
Expected output:
- A line starting with
iishowing the installed version - A directory listing containing the standard Ouster launch files:
driver.launch.py             record.launch.xml            replay_pcap.launch.xml
driver_launch.py             replay.composite.launch.xml  rviz.launch.py
record.composite.launch.xml  replay.launch.xml            rviz.launch.xml
sensor.composite.launch.py   sensor.composite.launch.xml  sensor.launch.xml
sensor_mtp.launch.xml
💡 Why
aptrather than building from source? The Debian package is officially maintained, signed, and reproducible across machines. Build from source only when you need a feature that has not yet been packaged, or when you need to modify the driver itself.
Step 4 — Install CycloneDDS
ROS 2 Humble ships with Fast DDS as the default middleware. For high-density point clouds (OS0-128 streaming at 20 Hz produces around 80 MB/s of fragmented UDP traffic), CycloneDDS is significantly more robust against packet loss.
4.1 Install the CycloneDDS RMW
sudo apt install ros-humble-rmw-cyclonedds-cpp -y
This single command pulls in everything needed: ros-humble-cyclonedds, ros-humble-rmw-cyclonedds-cpp, and the Iceoryx shared-memory dependencies.
4.2 Verify the installation
dpkg -l ros-humble-rmw-cyclonedds-cpp | tail -1
dpkg -l ros-humble-cyclonedds | tail -1
ros2 doctor --report 2>/dev/null | grep cyclonedds
Expected output:
- Both packages installed (lines beginning with
ii) - A line of the form
rmw_cyclonedds_cpp : latest=X.X.X, local=X.X.X
⚠️ At this stage CycloneDDS is installed but not yet active. Both middlewares coexist on the system, and the default RMW is still Fast DDS. CycloneDDS is activated through environment variables in Step 8.
4.3 Why CycloneDDS for the Ouster
| Aspect | Fast DDS (default) | CycloneDDS |
|---|---|---|
| Architecture | Peer-to-peer | Peer-to-peer |
| Multicast discovery | Yes | Yes |
| Behavior on fragmented UDP bursts | Conservative defaults, can drop packets | More aggressive buffering, recommended for dense LiDAR |
| Adoption in mobile robotics | Widespread | Widespread, often preferred for LiDAR |
| Official ROS 2 support | Yes (default) | Yes (alternative) |
For OS0-128 at 20 Hz, every point cloud is around 4 MB fragmented into about 60 UDP packets. A single dropped packet discards the whole point cloud. CycloneDDS combined with the kernel buffer tuning of Step 7 produces a noticeably more stable stream than the default Fast DDS configuration.
Step 5 — Identify Network Interfaces
List the network interfaces available on the host:
ip -br link show
Example output:
lo               UNKNOWN        00:00:00:00:00:00 <LOOPBACK,UP,LOWER_UP>
enp4s0           DOWN           98:ee:cb:94:78:78 <NO-CARRIER,BROADCAST,MULTICAST,UP>
wlp3s0           UP             1c:1b:b5:91:42:ae <BROADCAST,MULTICAST,UP,LOWER_UP>
| Interface type | Typical name | Role in this setup |
|---|---|---|
| Loopback | lo |
Inter-node communication on the same machine (automatic) |
| Wired Ethernet | enpXsY / enoX |
Ouster sensor (UDP), multi-machine LAN |
| Wi-Fi | wlpXsY |
Multi-machine over a wireless network |
Take note of the exact names of your Ethernet and Wi-Fi interfaces — they are needed in Step 6.
5.1 Confirm the sensor interface (optional)
Once the Ouster is physically connected, you can confirm the right interface is receiving its packets:
sudo apt install tcpdump -y
sudo tcpdump -i enp4s0 -c 5 udp port 7502
If UDP packets scroll by, you are looking at the correct interface.
Step 6 — Create the CycloneDDS Configuration File
CycloneDDS reads its configuration from an XML file pointed to by the CYCLONEDDS_URI environment variable. Create a dedicated configuration tuned for Ouster and multi-interface hosts.
mkdir -p ~/.ros
nano ~/.ros/cyclonedds.xml
Paste the following content, replacing enp4s0 and wlp3s0 with your own interface names:
<?xml version="1.0" encoding="UTF-8" ?>
<CycloneDDS xmlns="https://cdds.io/config"
            xmlns:xsi="http://www.w3.org/2001/XMLSchema-instance"
            xsi:schemaLocation="https://cdds.io/config https://raw.githubusercontent.com/eclipse-cyclonedds/cyclonedds/master/etc/cyclonedds.xsd">
    <Domain Id="any">
        <General>
            <Interfaces>
                <NetworkInterface name="enp4s0" priority="default" multicast="default" presence_required="false"/>
                <NetworkInterface name="wlp3s0" priority="default" multicast="default" presence_required="false"/>
            </Interfaces>
            <AllowMulticast>default</AllowMulticast>
            <MaxMessageSize>65500B</MaxMessageSize>
        </General>
        <Internal>
            <SocketReceiveBufferSize min="10MB"/>
            <Watermarks>
                <WhcHigh>500kB</WhcHigh>
            </Watermarks>
        </Internal>
    </Domain>
</CycloneDDS>
Save the file with Ctrl+O, then Enter, then Ctrl+X to exit.
6.1 Parameter reference
| Parameter | Role |
|---|---|
NetworkInterface |
Interfaces CycloneDDS is allowed to use |
presence_required="false" |
Allows CycloneDDS to start even if a listed interface is DOWN |
AllowMulticast |
Enables automatic peer discovery on the LAN |
MaxMessageSize 65500B |
Allows full-size fragmented UDP packets |
SocketReceiveBufferSize min="10MB" |
Receive buffer requested from the kernel |
WhcHigh 500kB |
Writer history cache high-water mark, important for large publishers |
⚠️
presence_required="false"is critical on development laptops where the Ethernet cable is not always plugged in. Without it, CycloneDDS refuses to start as soon as any listed interface isDOWN, breaking even simple ROS 2 commands.
💡 Humble-specific note. Older builds of
ros-humble-cycloneddsmay use an earlier schema revision, but the XML above is forward-compatible. If CycloneDDS rejects the file on parse, simply remove thepresence_requiredattribute and rely on always-up interfaces.
6.2 Verify the file
cat ~/.ros/cyclonedds.xml
A copy of this configuration is also available in the configs/ folder of this repository.
Step 7 — Increase Kernel UDP Buffers
This step is the one most often forgotten — and it is the single biggest cause of packet drops on dense LiDARs.
When the Ouster sends a point cloud, the Linux kernel queues the UDP packets in a socket buffer before CycloneDDS reads them. If that buffer is too small, the kernel drops packets before CycloneDDS ever sees them. No middleware tuning can recover from that loss.
By default, net.core.rmem_max is around 200 KB on Ubuntu. We will raise it to 2 GB.
7.1 Create the sysctl file
sudo nano /etc/sysctl.d/10-cyclone-max.conf
Paste the following content:
net.core.rmem_max=2147483647
net.core.rmem_default=2147483647
net.ipv4.ipfrag_time=3
net.ipv4.ipfrag_high_thresh=134217728
7.2 Apply without rebooting
sudo sysctl -p /etc/sysctl.d/10-cyclone-max.conf
7.3 Verify
sysctl net.core.rmem_max net.core.rmem_default net.ipv4.ipfrag_time net.ipv4.ipfrag_high_thresh
Expected output:
net.core.rmem_max = 2147483647
net.core.rmem_default = 2147483647
net.ipv4.ipfrag_time = 3
net.ipv4.ipfrag_high_thresh = 134217728
💡 These settings persist across reboots. The file in
/etc/sysctl.d/is loaded automatically by systemd at boot time.
7.4 Parameter reference
| Parameter | Role |
|---|---|
net.core.rmem_max |
Maximum receive buffer CycloneDDS may request (2 GB ceiling) |
net.core.rmem_default |
Default buffer size allocated to new sockets |
net.ipv4.ipfrag_time |
Maximum time a partial IP fragment is kept (3 s instead of the default 30 s) |
net.ipv4.ipfrag_high_thresh |
Maximum amount of memory used for fragment reassembly (128 MB) |
A copy of this file is also available in the configs/ folder of this repository.
Step 8 — Activate CycloneDDS via .bashrc
Up to this point, CycloneDDS is installed and configured but not active. We now wire it into every shell session.
8.1 Inspect what is already in .bashrc
grep -E "ROS|RMW|CYCLONE" ~/.bashrc
Make a note of whether source /opt/ros/humble/setup.bash is already present — it must appear only once in the file.
8.2 Edit .bashrc
nano ~/.bashrc
Append the following block at the very end of the file. If source /opt/ros/humble/setup.bash is already present higher up in the file, do not duplicate it — leave the source line out of the block below.
# =========================
# ROS 2 Humble
# =========================
# (Skip this line if Humble is already sourced earlier in this file.)
source /opt/ros/humble/setup.bash

# =========================
# DDS Middleware — CycloneDDS
# =========================
export RMW_IMPLEMENTATION=rmw_cyclonedds_cpp
export CYCLONEDDS_URI=file://$HOME/.ros/cyclonedds.xml

# ROS Domain — change this if multiple teams share the same LAN
export ROS_DOMAIN_ID=0
Save and exit (Ctrl+O, Enter, Ctrl+X).
8.3 Reload the shell
source ~/.bashrc
8.4 Verify
echo "RMW    = $RMW_IMPLEMENTATION"
echo "URI    = $CYCLONEDDS_URI"
echo "Domain = $ROS_DOMAIN_ID"
ros2 doctor --report 2>/dev/null | grep -A1 "RMW MIDDLEWARE"
Expected output:
RMW    = rmw_cyclonedds_cpp
URI    = file:///home/<user>/.ros/cyclonedds.xml
Domain = 0
   RMW MIDDLEWARE
middleware name    : rmw_cyclonedds_cpp
✅ CycloneDDS is now the active ROS 2 middleware on this machine.
⚠️ Every terminal must source
.bashrcto inherit these variables. If a node is launched from an IDE or a systemd unit that does not source.bashrc, it will fall back to Fast DDS and will not see any topic published by your other CycloneDDS nodes. Always double-check withecho $RMW_IMPLEMENTATIONin each new terminal during debugging sessions.
Step 9 — Validate DDS Communication
This sanity check confirms that pub/sub, node discovery, and DDS transport all work — without needing the physical sensor.
9.1 Terminal 1 — Publisher
ros2 topic pub /test_cyclone std_msgs/String "data: hello cyclone $(date +%T)" -r 5
Expected output: continuous lines of the form
publisher: beginning loop
publishing #1: std_msgs.msg.String(data='hello cyclone 14:32:01')
...
Leave this terminal running.
9.2 Terminal 2 — Subscriber
ros2 topic echo /test_cyclone
Expected output:
data: hello cyclone 14:32:01
---
data: hello cyclone 14:32:01
---
9.3 Terminal 3 — Introspection
ros2 topic list
ros2 topic info /test_cyclone
ros2 topic hz /test_cyclone
Expected output:
ros2 topic listshows/test_cyclone,/parameter_eventsand/rosoutros2 topic inforeportsType: std_msgs/msg/String,Publisher count: 1,Subscription count: ≥1ros2 topic hzreportsaverage rate: 5.000
Stop all three terminals with Ctrl+C.
💡 What this proves. A successful test confirms that node creation, DDS transport, automatic discovery, and the local loopback path are all working. Any ROS 2 node — including the Ouster driver — will now use CycloneDDS through the same pipeline.
Step 10 — First Launch with the Physical Sensor
This is the final step: confirm that the entire stack works end-to-end with the actual Ouster sensor.
10.1 Prerequisites
- The sensor is powered (PoE+ injector or sensor PoE switch).
- The sensor is connected to the host’s Ethernet interface (
enp4s0in our example). - The Ethernet interface is
UP(check withip -br link show enp4s0).
10.2 Discover the sensor on the network
Ouster sensors advertise their hostname via mDNS:
sudo apt install avahi-utils -y
avahi-browse -art | grep ouster
Alternatively, ping the sensor by hostname (replace with your serial):
ping -4 os-<SERIAL>.local
10.3 Launch the driver
ros2 launch ouster_ros sensor.launch.xml \
    sensor_hostname:=os-<SERIAL>.local \
    viz:=true
If everything is correctly configured, RViz2 opens automatically and the point cloud appears within a few seconds.
10.4 Validate the topic rates
In a separate terminal:
ros2 topic hz /ouster/points
ros2 topic hz /ouster/imu
ros2 topic bw /ouster/points
Expected output:
/ouster/points→ stable 10 Hz or 20 Hz (depending onlidar_mode)/ouster/imu→ stable 100 Hz/ouster/points→ consistent bandwidth (40–80 MB/s for OS0-128 at 20 Hz)
10.5 Check for kernel-level drops
netstat -su | grep -i "receive buffer errors"
During a healthy run, this counter should not increase. If it does, revisit Step 7 and confirm that net.core.rmem_max is set to 2 GB.
Published ROS 2 Topics
Once the driver is running, the following topics are published. The most important for SLAM and downstream perception are highlighted.
| Topic | Type | Usage |
|---|---|---|
/ouster/points |
sensor_msgs/PointCloud2 |
3D dense point cloud — used by KISS-ICP, FAST-LIO2, LIO-SAM, RTAB-Map |
/ouster/imu |
sensor_msgs/Imu |
100 Hz IMU — required by FAST-LIO2 and LIO-SAM |
/ouster/scan |
sensor_msgs/LaserScan |
Single ring of the lidar — not a horizontal projection. See note below |
/ouster/range_image |
sensor_msgs/Image |
Depth image — useful for debugging and ML |
/ouster/signal_image |
sensor_msgs/Image |
Reflectance intensity image |
/ouster/nearir_image |
sensor_msgs/Image |
Near-IR image — useful in low-light nuclear and industrial inspection |
/ouster/reflec_image |
sensor_msgs/Image |
Calibrated reflectivity image |
/ouster/metadata |
std_msgs/String |
Sensor JSON metadata |
/tf, /tf_static |
tf2_msgs/TFMessage |
Static and dynamic frame transforms |
⚠️ A common pitfall:
/ouster/scanis not a 360° horizontal projection of the point cloud. It is a single elevation ring of the LiDAR, configurable via thescan_ringparameter. For 2D SLAM (for example with SLAM Toolbox), usepointcloud_to_laserscaninstead — see 3D → 2D Conversion for SLAM Toolbox.
Useful Commands — Record, Replay and PCAP
Record a rosbag
ros2 launch ouster_ros record.launch.xml \
    sensor_hostname:=os-<SERIAL>.local \
    bag_file:=capture_$(date +%Y%m%d_%H%M%S)
💡 In ROS 2, a bag is a directory, not a single
.bagfile as in ROS 1. The directory containsmetadata.yamlplus one or more.db3(SQLite) files.
💡 MCAP storage on Humble. MCAP support is available on Humble via an additional package:
sudo apt install ros-humble-rosbag2-storage-mcap -y. Once installed, record withros2 bag record -s mcap .... MCAP is faster to replay and portable across ROS 2 distributions, making it the preferred format for SLAM datasets that may also be replayed on a Jazzy machine.
ros2 bag record -s mcap \
    /ouster/points /ouster/imu /tf /tf_static
Replay a rosbag
ros2 launch ouster_ros replay.launch.xml \
    bag_file:=/path/to/capture_XXXXXXXX \
    metadata:=/path/to/metadata.json
⚠️ The Ouster sensor metadata JSON is required for replay. It is normally captured automatically alongside the rosbag. Without it, the replayed point clouds will be geometrically incorrect.
Replay a PCAP file
ros2 launch ouster_ros replay_pcap.launch.xml \
    pcap_file:=/path/to/file.pcap \
    metadata:=/path/to/file.json
PCAP is the native Ouster format for sharing datasets — it captures the raw UDP stream as the sensor emitted it, independently of ROS.
Launch without visualization (saves CPU)
ros2 launch ouster_ros sensor.launch.xml \
    sensor_hostname:=os-<SERIAL>.local \
    viz:=false
3D → 2D Conversion for SLAM Toolbox
SLAM Toolbox is a 2D SLAM stack and expects a sensor_msgs/LaserScan input. As mentioned above, /ouster/scan is a single elevation ring and is therefore poorly suited for proper 2D mapping. The recommended approach is to project a horizontal slice of the 3D point cloud into a synthetic LaserScan.
Install pointcloud_to_laserscan
sudo apt install ros-humble-pointcloud-to-laserscan -y
Example launch file
from launch import LaunchDescription
from launch_ros.actions import Node

def generate_launch_description():
    return LaunchDescription([
        Node(
            package='pointcloud_to_laserscan',
            executable='pointcloud_to_laserscan_node',
            name='pc_to_scan',
            remappings=[('cloud_in', '/ouster/points'),
                        ('scan', '/scan')],
            parameters=[{
                'target_frame': 'base_link',
                'transform_tolerance': 0.01,
                'min_height': -0.2,
                'max_height': 0.3,
                'angle_min': -3.14159,
                'angle_max':  3.14159,
                'angle_increment': 0.0087,
                'scan_time': 0.1,
                'range_min': 0.5,
                'range_max': 50.0,
                'use_inf': True,
                'concurrency_level': 2,
            }]
        )
    ])
Key parameters
| Parameter | Effect |
|---|---|
target_frame |
Frame in which the slice is taken — usually base_link so the slice stays horizontal regardless of sensor tilt |
min_height / max_height |
Vertical thickness of the slice projected to 2D |
angle_increment |
Angular resolution of the synthetic scan (0.0087 rad ≈ 0.5°) |
range_max |
Maximum range — match to the sensor’s reliable range in your environment |
💡 Tilted lidars (e.g. on Spot). Setting
target_frame: base_linkis what makes this approach robust — the slice is taken in the robot’s horizontal plane, even when the LiDAR itself is physically tilted on the platform.
Multi-Machine Configuration
The configuration described above works on a single machine. For a multi-machine setup (e.g. a development laptop talking to an embedded robot PC), a few additional points apply.
Same RMW everywhere
All machines must use the same RMW implementation. Mixing CycloneDDS and Fast DDS produces nodes that do not see each other.
echo $RMW_IMPLEMENTATION # must return rmw_cyclonedds_cpp on every machine
Same ROS_DOMAIN_ID
echo $ROS_DOMAIN_ID # must be identical on every machine
Multicast must be reachable
CycloneDDS discovers peers via UDP multicast. Most consumer Wi-Fi routers block or rate-limit multicast traffic, which silently breaks discovery between machines.
| Connection type | Multicast reliability |
|---|---|
| Direct Ethernet crossover cable | ✅ Excellent |
| Managed switch | ✅ Excellent |
| Dedicated unmanaged switch | ✅ Good |
| Home Wi-Fi router | ⚠️ Often unreliable |
For serious multi-robot work, prefer a wired connection or a dedicated switch.
Per-host interface tuning
The CycloneDDS XML file from Step 6 must be adapted on each machine to match its actual interface names. Run ip -br link show on every host and update the NetworkInterface name="…" entries accordingly.
Humble ↔ Jazzy interoperability
A common scenario in research labs is to mix machines running different ROS 2 distributions — for example a Humble workstation talking to a Jazzy robot PC. ROS 2 is generally backward-compatible for standard message types, provided:
- Both sides use the same RMW (
rmw_cyclonedds_cppon both). - Both sides use the same
ROS_DOMAIN_ID. - Both sides exchange only standard message types (
std_msgs,sensor_msgs,geometry_msgs, etc.). Custom message definitions must be compiled on each distribution separately. - Rosbags recorded on one side use MCAP (portable across distributions) rather than the legacy SQLite storage.
This is exactly the pattern used to replay a Humble-recorded Ouster dataset on a Jazzy development machine.
Troubleshooting
enpXsY: does not match an available interface
CycloneDDS refuses to start because an interface listed in the XML is DOWN or absent.
Fix: add presence_required="false" to every NetworkInterface entry in ~/.ros/cyclonedds.xml, as shown in Step 6.
Topics are not visible between two terminals on the same machine
Check that both terminals have inherited the CycloneDDS environment variables:
echo $RMW_IMPLEMENTATION   # rmw_cyclonedds_cpp
echo $CYCLONEDDS_URI       # file:///home/<user>/.ros/cyclonedds.xml
If one of them returns an empty string or rmw_fastrtps_cpp, run source ~/.bashrc in that terminal.
Visible packet drops on /ouster/points
- Check kernel UDP buffers:
sysctl net.core.rmem_max # must return 2147483647 - Check kernel-level drop counter during a run:
netstat -su | grep "receive buffer errors"If this counter grows during the run, the buffer is still too small or the CPU is saturated.
- Confirm CycloneDDS is the active middleware:
ros2 doctor --report 2>/dev/null | grep -A1 "RMW MIDDLEWARE"
Sensor not reachable by hostname
- Confirm that
avahi-daemonis running:systemctl status avahi-daemon - Make sure
libnss-mdnsis installed:sudo apt install libnss-mdns - Try resolving with the explicit
.localsuffix:ping -4 os-<SERIAL>.local - Fall back to the sensor’s IP address if mDNS is blocked on your LAN
Multi-machine discovery does not work
- Confirm both machines use the same
RMW_IMPLEMENTATIONandROS_DOMAIN_ID - Test multicast manually:
iperf -s -u -B 239.255.0.1 -i 1on one host, matching client on the other - If multicast is blocked by the LAN, configure CycloneDDS in unicast peers mode (advanced — see CycloneDDS documentation)
Recommended Settings Summary
File locations
| File | Role |
|---|---|
~/.ros/cyclonedds.xml |
CycloneDDS configuration (network interfaces, buffers) |
/etc/sysctl.d/10-cyclone-max.conf |
Kernel UDP buffer tuning (persistent) |
~/.bashrc (modified) |
Activation of RMW_IMPLEMENTATION and CYCLONEDDS_URI |
Environment variables
| Variable | Recommended value |
|---|---|
RMW_IMPLEMENTATION |
rmw_cyclonedds_cpp |
CYCLONEDDS_URI |
file://$HOME/.ros/cyclonedds.xml |
ROS_DOMAIN_ID |
0 (change if sharing a LAN) |
Kernel parameters
| Parameter | Value |
|---|---|
net.core.rmem_max |
2147483647 (2 GB) |
net.core.rmem_default |
2147483647 (2 GB) |
net.ipv4.ipfrag_time |
3 seconds |
net.ipv4.ipfrag_high_thresh |
134217728 (128 MB) |
Project Files Created
This setup creates three files on the host system:
~/.ros/cyclonedds.xml                       # CycloneDDS config
/etc/sysctl.d/10-cyclone-max.conf           # Kernel UDP buffers
~/.bashrc (modified)                        # RMW + URI environment variables
Reference copies of the first two files are included in this repository under configs/ for reuse on other machines.
Official Resources
- Ouster ROS 2 Driver — GitHub
- Ouster Sensor Documentation
- Ouster SDK Documentation
- ROS 2 Humble Documentation
- ROS 2 DDS Tuning Guide
- Eclipse CycloneDDS — GitHub
pointcloud_to_laserscan— GitHub
License
This tutorial is provided as a technical reference for robotics, mapping, and SLAM workflows using Ouster LiDAR sensors with ROS 2 and CycloneDDS. You are welcome to adapt it to your own projects — attribution is appreciated.